How to Make a Complete Statement of Work

If you’re in project management, you must be no stranger to the Statement of Work (SOW).
So much so that you probably know that when writing a statement of work, there’s rarely room for error. Because SOW sets the stage for future cooperation and is part of a legally binding agreement, even a tiny mistake or misunderstanding can ricochet.
On the bright side, recording all the ins and outs of the project in advance, it can eventually save you from a world of trouble. That’s why you want your statement of work to be comprehensive and well-polished before anyone signs on the dotted line. We’ve made this guide to help you achieve exactly that, so let’s get started:
- What Is a Statement of Work?
- What a Statement of Work Is NOT
- Who Writes a Statement of Work
- What Does a Statement of Work Document Do?
- The Importance of Having a Statement of Work
- When Start Writing a Statement of Work
- The Key Elements of a Statement of Work
- How to Write a Good Statement of Work
- Key takeaways
- How to create a Statement of Work in Word
What Is a Statement of Work?
A statement of work, also known as “scope of work” is a contractual document that outlines what goes into the project in as much detail as possible.
A Guide to the Project Management Body of Knowledge (PMBOK) defines a statement of work as “a narrative description of products or services to be supplied under contract.”
The Digital Project Manager refers to it as “an agreement between a client and an agency, contractor, or service provider that defines what’s included within a project, and what’s not.”
In project management, SOW always covers the deal between two parties - a project-based company and the client. It’s important to note that a statement of work is usually an appendix A to the terms and conditions of the contract and should be taken seriously.
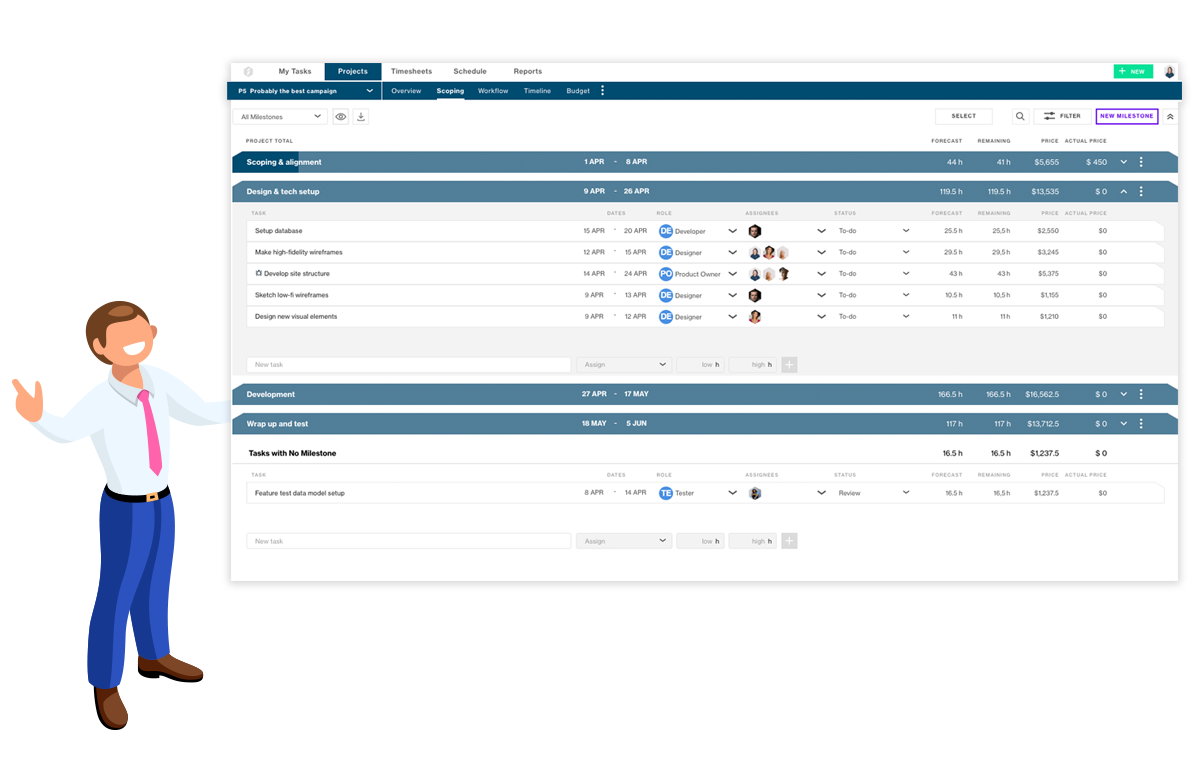
You'll find a template for the statement of work in Forecast on the project's Scoping page. Here's a sneak peek:

What a Statement of Work Is NOT
The term ‘statement of work’ is sometimes misinterpreted, largely because of a myriad of project-related documents out there in the business development space. Here are a few cases to remember and differentiate it from other ones.
Statement of Work vs. Project Charter
These two documents are often confused because both are signed during the kickoff phase of the project. SOW, however, is only a part of the project charter development process. Additionally, SOW does not authorize a project manager to spend a project budget and project resources, while project charter does. In contrast to a project charter, SOW does not initiate the project.
Statement of Work vs. Contract
The statement of work is not a contract by itself, it’s an integral part of the contract that, in turn, covers all the nitty-gritty details of the cooperation and the project. While a statement of work can be sent to the client for approval and is flexible to change and negotiable, a contract is the final step in the negotiation process that binds both parties together.
Statement of Work vs. Scope of Work
Both terms are often used interchangeably, but depending on the context, there’s yet a slight difference between the two. The statement of work is a high-level document that defines a project by presenting its mission, deliverables, and success criteria. A scope of work (referring to project scope) is only an element used in the statement of work, illustrating milestones and tasks for a project team to accomplish and meet project objectives.
Who Writes a Statement of Work
Whenever a company takes up a new project, someone is tasked with writing a SOW. Who? Depending on the kind of the project - internal or external, different roles can be assigned to create a statement of work.
If an internal project is planned, the paperwork is often handed to the project management office, project stakeholders, or user groups.
If you’re delivering services externally, this task can be allocated to project managers, project sponsors, and even clients or independent third parties.
Most of the time, SOW is written when projects are to be delivered for external clients with project managers doing the necessary administrative duties.
What Does a Statement of Work Document Do?
The purpose of the statement of work is to serve as a means of understanding between you and your client.
Therefore, it defines the project, including the mission, the scope, basic requirements, a thorough outline of tasks to be completed, start and end dates, critical resources needed, milestones and timeline, terms, and most importantly, a signature from both parties.
The agency, the executing team, and the client should all know what's precisely agreed upon.
Why Use a Statement of Work
As a fundamental part of the contract, it may seem that the only benefit of SOW is to seal the agreement. However, the statement of work is much more than that! It facilitates the discussion, helping you get the needed overview and understand what you have to offer to the client.
Having a clean statement of work from the beginning, you can also get through the approval process faster. Yet another benefit, a good statement of work helps to mitigate a lot of errors. And that’s without even mentioning that with SOW you and your client are on the same page.
Creating a good statement of work should always be in the interest of both the professional services business and client. For service providers, it helps to avoid the risk of potential scope creep, while for the client, it provides comfort in knowing what's going to be handed over to them at the end, not to mention the price of completing the project.
SOW is also a go-to document for the team to make day-to-day decisions. It prevents the team from getting into many traps when the project is in execution, such as disputes over project requirements, “selective amnesia,” and rework, to name a few.
When Start Writing a Statement of Work
So when is the best time to start making a statement of work? Ideally, the first idea of SOW should be nurtured when preparing the elevator pitch and exploring your client’s business needs. It’s time to draft an outline after you had the discovery call or meeting with the prospect and increase the level of details as you go.
To create a complete project statement of work, you’ll need to ask the right questions from the beginning. Think about the problem from the point of view of the client. How does the project address their problem? What is it worth to them? What do they get in return for spending their money? Is what you’re offering unique? Engaging the client in a robust discussion before writing a SOW is critical to tread the path for success.
The Key Elements of a SOW
Looking through hundreds of SOW documents and samples, we’ve made a list of these key elements that go into the structure of every successful project statement of work and make it complete:
- Project objectives. Most of the time, this section is a purpose statement that answers a set of very specific, big questions. What is the purpose and mission of the project? Why have you initiated it in the first place? How will both parties benefit from the project?
- Scope of work. This is a designated section for putting down what work needs to be completed in the project, how it will be executed, and how much time the project will take. General steps and process details should all be specified here.
- Place & time of execution. Most statement of work documents use this section to identify where the project will take place. It becomes especially relevant in global settings. For example, when you and your client are in different countries and time zones.
- Milestones. If the project is long and complex, it’s often broken down into milestones - interim events for measuring progress. Specifying duration and billable hours for each milestone will help you predict the end date of the project.
- Tasks. Tasks are clear-cut activities to achieve milestones and general steps outlined in the scope of work. This is where you should be as descriptive as possible so as not to miss out on any crucial steps.
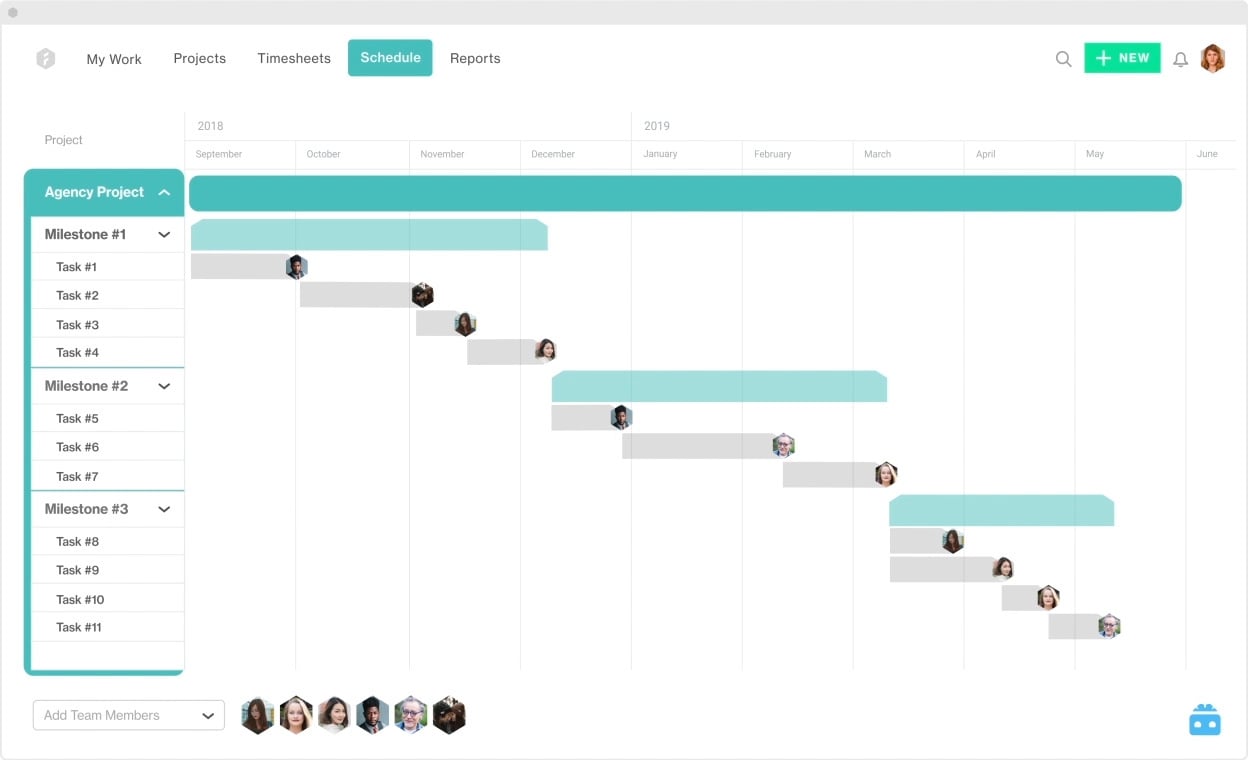
- Schedule. A key element in the SOW, a schedule is a project timeline including milestones, tasks, and resources throughout the project’s lifecycle. Depending on the type of engagement you’re in, the schedule can be left until a later point. For example, if retainer agreements are used and you’re delivering services on an on-going basis, there will be less paperwork and, consequently, the schedule could be excluded.
- Deliverables. A complete SOW will quantify products or services that must be provided upon the completion of a project. Illustrate them and indicate what is due and when it is due.
- Testing. Testing is relevant in a software development statement of work, for instance. Dedicate a section to it if and how the deliverables will be evaluated.
- Expected outcomes. This is yours and your client’s definition of how success will look like when the project is delivered.
- Special terms, conditions, and requirements. Here you’ll specify payment terms and other parts of the project that don’t fit in the above categories.
- Closure. This will determine how the deliverables will be accepted, and who will deliver, review and sign off on the deliverables. Also, it deals with the final admin duties, making sure everything is signed and closed and archived.
How to Write a Good Statement of Work
Without a doubt, writing a good statement of work requires training. It often comes with the challenge of 1) not knowing how to accurately plan a project, 2) where to start, and 3) how to visualize your plan and deliverables. These are the steps you can take to create a simple, but well-defined statement of work.
1. Introduce the project
You always begin the statement of work with an introduction. This section introduces each key stakeholder in the project, i.e., the client, the agency, and third-party stakeholders, if any. The introduction is also where you briefly define the project and the work that needs to be completed. In addition to this, as this is a binding agreement, both parties should know what they agree to by signing the SOW.

Key takeaway: Introduce the project and the stakeholders and ensure that the client understands that the SOW is a formal agreement.
2. Define the vision
A statement of work should always include a vision or purpose of the project. The vision is a great way to create goals and is an opportunity to set achievable expectations. The vision can touch on what is expected to be delivered? What is the goal of the final deliverable? Who is the end-user, and how do they want to use it? What problem should the project solve?
Moving on from this step, the mission or how we're going to deliver on this vision will be defined.
Key takeaway: Ensure the mission is set and that everybody understands and agrees on the nature of the deliverable. Which problem needs to be solved, for whom?
3. Set the project requirements
What are the main foundational requirements of the project? Referring back to the mission, what problem should the deliverable solve for the end-user? And, how? Make sure you understand each other, and make a list of each requirement. This list is used later in the process to setup the actual tasks, i.e., the scoping process.
Key takeaway: Specify the project requirements based on the mission defined earlier. List the requirements, and save them for scoping.
4. Define the scope
After defining the vision and project requirements, the next priority is defining the scope. What is within the scope? What is outside of the scope? These two questions are vital points to agree upon, define, and setup for the project. This is the foundation for the rest of the planning process. It's essentially when the milestones are scoped out for the project. Not necessarily on a task level yet, but enough to align goals and expectations between the agency and the client.

Key takeaway: Set up the scope based on previously defined project requirements. What is in, and what is out of scope? Specify milestones and align with the client.
5. Set the deadline of the project
Setting start and end dates of a project can seem easy, but not if you want a reliable end date. Time estimations of tasks, capacity available of needed roles, and total cost of the project are all difficult to estimate, however, essential to track progress.
Using a platform that can assist you in doing these estimations can greatly improve reliability and accuracy. Forecast's Auto Schedule puts the cumulative skills and learnings from hundreds of thousands of projects to estimate tasks and predict a delivery date. In addition, it not only takes all facets of this project into account but accommodates all projects across your company, while connecting them with the resources available to you.
Key takeaway: Project initiation date and deadlines are set based on time, resource, and budget estimations. A business management platform can assist in this process.
6. Allocate key resources
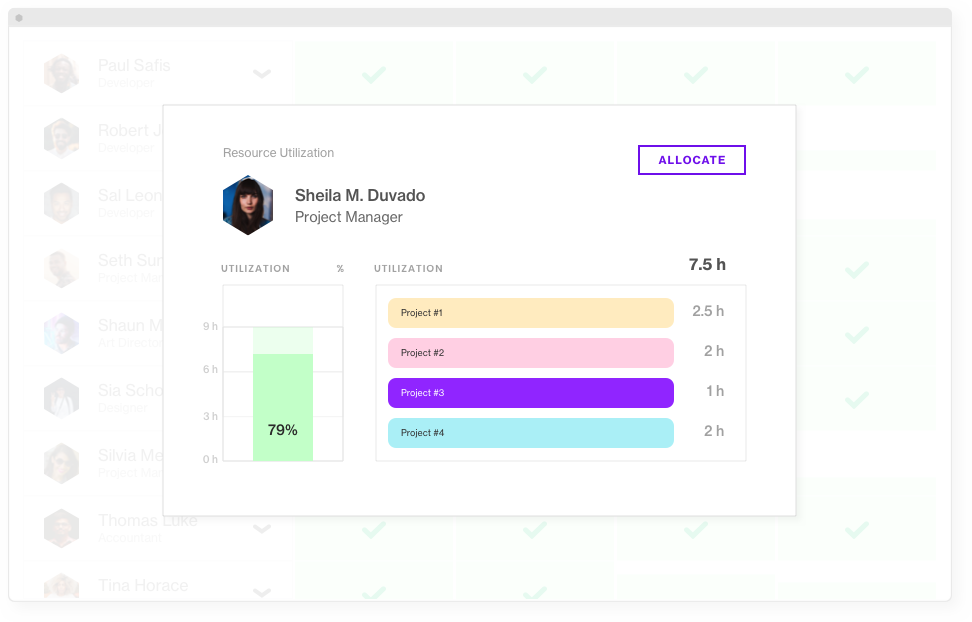
Projects don't just need enough resources, they need enough of the right resources. Roles, skills of people, and the available capacity are often overlooked. It's important to assess which types of resources are needed for a given project to ensure that a delivery is possible within the set framework. Likewise, this helps to ensure a high utilization level.

Utilizing your team to the fullest capacity can be a driving factor for clients to book your company for their next project. If you don't have the right resources, you might not be able to finish the project within the agreed upon statement of work. Here’s something to consider: Which types of resources do you need for this project? How many hours are required by role, and are the resources available?
Key takeaway: Proper capacity management ensures that the right people are available when needed. Allocation and scheduling of resources can be made with confidence only if you have a holistic overview.
7. Create the schedule
When you have defined the scope, start and end dates, and agreed upon the available resources, you can begin to set up the timeline of the project. It's always a good idea to discuss milestones and timeline with your client while you create the SOW. You don't want to end up running outside the perimeters upon which you agreed. With the timeline you will know what milestones should be delivered when and in which order.

Key takeaway: Managing the schedule is done based on the scope, start and end dates, and the capacity available to your project.
8. Specify the terms of payment and due dates
Like any other agreement involving an exchange of money or things, you need to include the terms of how you're going to be compensated for the work you're delivering, i.e., the terms of payment and due dates.
Key takeaway: Include the terms of payment and specify due dates.
9. Include special requirements
Lastly, are there any special requirements needed to be taken into account? This could be special security measures, for example, who has access to the project or who can access databases of trade secret information, etc.
Key takeaway: Any special requirements needed for the project should be included in the statement of work.
10. Accept & sign
The document can be signed when all the previous 9 points have been thoroughly defined, read, and understood by both parties. The SOW is agreed upon and signed.
Now, the statement of work document works as both the formal document and the practical action plan when initiating and implementing the project. It ensures that both parties have established a common ground and have an understanding about the full life cycle of the project.
Key takeaway: Ensure both the client and the project team understands and agrees upon the SOW and sign the contract.
Key takeaways
Having a well-defined statement of work in place is the first stepping stone to running, executing, and delivering a successful project. A project that can be delivered on time, in scope, and within the budget. The SOW works as reference material during the project. It lists the central purpose of the project and the work that needs to be completed and delivered by the end of the project. This is all agreed upon through signing the SOW.
Summary of key findings
- Introduce key stakeholders and the project. The client, the agency, any any third-party stakeholders. A brief introduction to the project is usually included.
- Define the mission of the project. What is the problem that needs to be solved, and who are the end-users of the deliverable?
- Set the project requirements. Based on the mission, the project requirements are defined.
- Define the scope. What is in-scope and what is out of scope for the project?
- Initiate the project and set a deadline for deliverables with attention to your total capacity, capacity for each role needed, and the schedule. Using a business management platform can be of great assistance.
- Allocate key resources with attention to capacity limits, availability, and the schedule.
- Manage the roadmap with the scope, start and end dates, and the capacity available for your project.
- Define terms of payment and due dates to ensure everybody is on the same page.
- Set special requirements if anything is needed apart from what is previously defined in the SOW.
- Accept and sign the statement of work and start working.
To wrap it up, for full transparency and understanding between agency, team members, and the client, everybody should know what is agreed upon in the SOW. Setting up the SOW should be a collaborative effort as the SOW is a means of understanding.
Apart from knowing what is agreed on to be completed, the statement of work also shows what was not agreed on. This is a way to avoid potential scope creep. Scope creep is the act of taking on more work than what was initially agreed upon. In other words, extra "unpaid" work is sneaking up on your time.
As the next step, you'd probably like to learn the principles of utilizing the statement of work for project managers and team members. Click on the image below to read more.
How to Create a Statement of Work in Word
If you are looking for some more instructions on how to create a statement of work in Word then you can follow this simple step-by-step guide below:
Step 1: Open Microsoft Word
Launch Microsoft Word on your computer.
Step 2: Set Up the Document
- Click on "File" in the top-left corner of the Word application.
- Select "New" to create a new document.
- In the search bar of the "New" window, type "Statement of Work" or "SOW" and press "Enter."
- Browse through the available templates or choose a blank document to start from scratch.
Step 3: Create the Header
- At the top of the document, type the project title in a larger font size, make it bold, and possibly center-align it.
- Below the project title, add the document's date, typically aligned to the right-hand side.
Step 4: Introduction
- Type "Introduction" as a heading. Make it bold and possibly use a larger font size.
- Under the "Introduction" heading, provide a clear and concise overview of the project's background, purpose, and objectives.
Step 5: Project Scope
- Create a heading called "Project Scope." Format it as a subheading.
- Under this heading, describe the project's scope in detail. Define what is included within the project and, equally importantly, what is explicitly excluded from it. Be as specific as possible.
Step 6: Objectives and Deliverables
- Add a section with the heading "Objectives and Deliverables." Format it as a subheading.
- List the specific objectives of the project and outline the deliverables that are expected upon project completion. Specify any acceptance criteria for these deliverables.
Step 7: Timeline and Milestones
- Create a section titled "Timeline and Milestones." Format it as a subheading.
- Outline the project schedule, including key milestones, start and end dates, and deadlines for major project phases. Use a clear and easy-to-read format, such as a table, by going to "Insert" > "Table" and selecting the appropriate number of rows and columns.
Step 8: Roles and Responsibilities
- Under the heading "Roles and Responsibilities," format it as a subheading.
- Detail the roles of team members involved in the project and their respective responsibilities. You can use a table to make this section organized and visually clear.
Step 9: Project Budget
- Add a section for the "Project Budget." Format it as a subheading.
- Specify the financial aspects of the project, including the budget allocation, cost estimates, and any cost constraints or billing arrangements. Tables can be helpful for presenting budget breakdowns.
Step 10: Terms and Conditions
- Create a section labeled "Terms and Conditions." Format it as a subheading.
- Include any legal or contractual terms and conditions relevant to the project. Tables might be used to present complex terms or clauses concisely.
Step 11: Client and Contractor Information
- Under separate headings like "Client Information" and "Contractor Information," provide contact details and relevant information for both parties involved in the project, including names, addresses, phone numbers, and email addresses.
Step 12: Review and Finalize
- Carefully review your document for accuracy, clarity, and completeness. Ensure that all sections are well-organized and that the language is precise.
- Adjust formatting, fonts, and styling as needed to maintain consistency throughout the document.
- Save the document with a meaningful name, such as "Project_Name_SOW.docx," in a location where it's easily accessible for future reference and use.
By incorporating tables where necessary, you can present complex information in an organized and visually appealing manner, making your Statement of Work more reader-friendly and comprehensive. Customize the document further to suit your specific project's needs while adhering to the structured template you've created.
You might like to read these articles on our blog..

Unleashing Operational Excellence: A Strategic Imperative for Professional Services Leaders.
Read moreFrom Vision to Execution: How Operational Excellence Drives Success in Professional Services
Read moreMaster Project Budget Management with Professional Services Automation
Read moreSubscribe to the Forecast Newsletter
Get a monthly roundup of productivity tips & hacks delivered straight to your inbox